Wednesday, May 26, 2010

Ruffle my bib {Part 2 & 3}


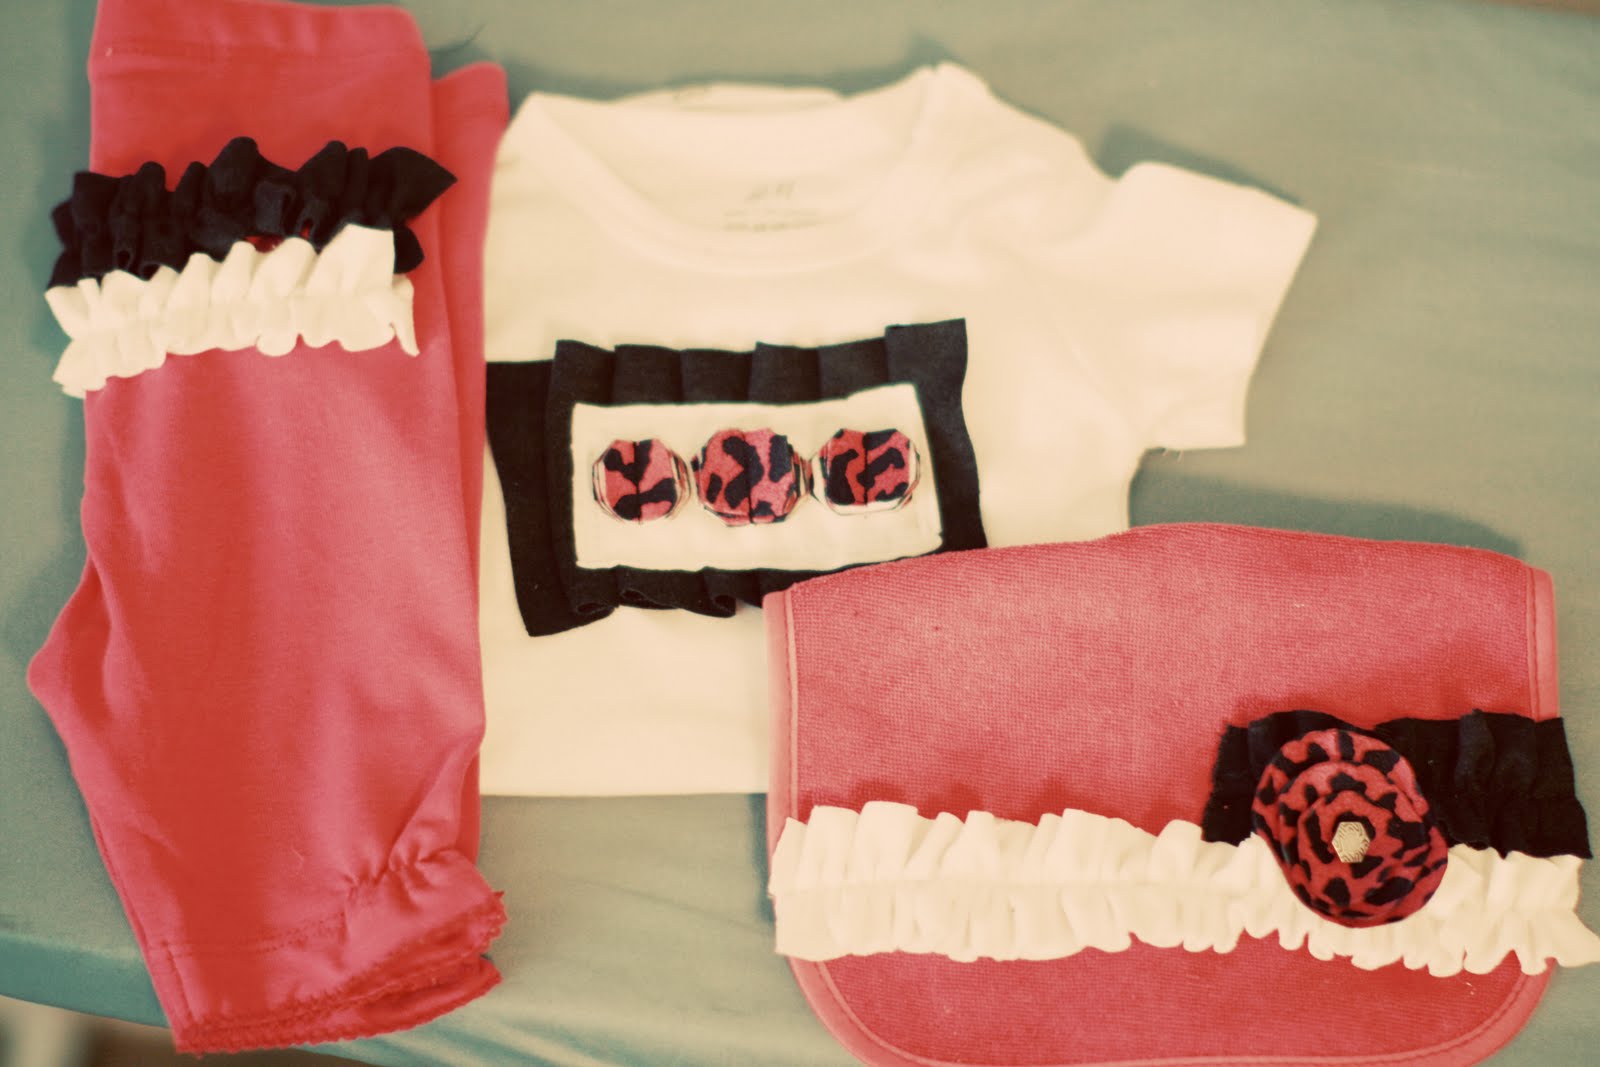
When I took these photos, I didn't take any separate images of the onesie, so here are parts 2 & 3 of this outfit together. For the onesie I copied this idea, just downsized it a bit. Started with the flowers and sewed them on this knit piece.

Then I ruffled this black knit piece and left it pinned down while I sewed the top piece on.


For the bottoms, I just replicated the process from the bib to the back of these cute little tights.


Once my sister-in-law welcomes her little girl into the world, we can pair this outfit with a cute little body and face.

Photobucket

Monday, May 24, 2010

B-day Bash

My little boy turned one last weekend, so we of course partied with him. I made a little b-day banner, hung some chinese lanterns, and made my first tiered cake for him.

I was told it looks a little like a Dr. Seuss cake. I like Dr. Seuss so I'm okay with that :)
It's not perfect, but it was fun to try.
Photobucket

Friday, May 21, 2010

Can I post about anything besides ruffles??


One of my favorite blog people is the fabulous Elizabeth Kartchner. (She's definitely top 5). I love her style, her scrapping, her ideas and just her overall goodness. She has a tutorial here for this little beauty (and much better pictures). However, you might want to be careful going over to her site, as you're sure to get hooked once you do! Okay, so here are a few shots of my attempt (and of course I had to create the look in both black and white).

Take your nasty, old, blah downeast tee

Cut strips 3/4" thick Pin them to your new tee to see how you want the finished product to look. And to make sure your ruffles are consistent.
Sew all those little strips down. (it's tedious, but once you've done a couple, you'll get the hang of it).Ooh, and I found it easier to sew the more I pinned. Even though the lighting is horrible in this picture, I thought it looked cool. And yes, that took me a while to do.

Try it out. It's a cheap way to get a Jcrew look-alike, and it re-purposes those old grungy tees.

Photobucket

Wednesday, May 19, 2010

A culinary gold mine


Have you heard of this wonderful blog?? Well, if you're like me and HATE trying to come up with new things to make for dinner, this is going to be your new best friend.
Easy recipes, beautiful photography, yummy food.

Last night I tried one of their delicious recipes found here. Doesn't it look delectable??


And tonight I'm going with this one.

Yummy yummy in my tummy.

Photobucket

Tuesday, May 18, 2010

Inspiration from Julie

How to cover up a big ugly white wall??
This solves that problem:
First, I got this idea from my friend Julie Browne. She is a mastermind of high-impact, low cost decorating and fashion. She has a big fabric wall hanging in her front room, and I wanted a similar look (can't you see how amazing Julie is?).
So... we tried it out by stapling a large piece of home decor fabric (which, by the way, I got on sale for $2.00/yard at Home Fabrics!) to a wooden frame we made from wood purchased from Home Depot. I think this project cost maybe $7.00. And, it only took two little nails to hang it from, so we didn't have to junk up the wall with a lot of nails. I might have purchased fabric with a little bigger pattern on it, since it's such a big piece of art. But I like the dimension it gives to our front room.

Thanks Julie!
Photobucket


Monday, May 17, 2010

Ruffle your bib

As the first post of a 3 part series, let me introduce the ruffled bib.


Here's how to create this cuteness. (Actual bib from a Target 10 pack)

First cut two strips of knit fabric and ruffle. For ruffle instructions see below. Second, place ruffles on bib and sew together. Cut ends off strips.


For the flower cut 3-4 circles of coordinating fabric and burn the edges. I used a lighter, but it's easier to use the flame from a candle. Stack circles and use a button to sew the flower onto the bib.


And that's it.


Instructions on how to ruffle fabric: Sew basting (wide) stitch down center of fabric and leave thread on both ends. Remove from sewing machine and pull one of the threads on one side. With other hand pull down fabric until it gathers the way you want.

Photobucket

Friday, May 14, 2010

Grapefruit Revolution


I'm a lover of grapefruit.

Always have been.

Memories with the fruit go way back to Grandma's house and the spoon with the little ridges. Dangerous utensil if you ask me. Anyway... this past weekend while sitting in a little Cafe in the heart of San Fran my eyes ran across an interesting menu item. Broiled Grapefruit??

Never heard of it.

Just tried it.

It's revolutionary. All you do cut the fruit in two and broil them facing up for about 5 minutes. The heat caramelizes the top and turns a somewhat tart experience into a sweet/tangy sensation.

And it's gone. Yum.


Photobucket

Wednesday, May 12, 2010

Crochted Scarf x 2

A big thank you to Beth for showing me what's up and how to crochet. We had a ball {literally} during our week in D-town making all sorts of fun things. After I got home I was inspired to make something of my own, so I fused a couple of the patterns we'd done together and came up with this. It keeps me warm during these cold, hard California months and I've gotten so many compliments on it, cause it's truly unique.

The big buttons are a must.

Loved it so much, I had to make 2.


Photobucket

Tuesday, May 11, 2010

Spice Up My Shrubbery

Announcement: I officially have a green thumb :) Okay maybe not quite yet, but I did plant some flowers in a pot a few weeks ago and they are GROWING! I haven't killed them yet!

Speaking of pots and plants, I came across this V and Co. tutorial for decorating your basic pottery with jute. What the heck is jute, you might ask? I did. Apparently, jute is a type of plant fiber used to make common items such as rope, twine, chair coverings, curtains, sacks, hessian cloth, carpets, and even the backing used on linoleum. It resembles hemp to me, and I suppose you could use hemp as well for this project. I really liked the polka dots. What a happy centerpiece!


Photobucket

Thursday, May 6, 2010

Edible Burton Custom Snowboard

Thank you, Linds, for posting that last entry about Stephanie. I've heard of "Nie Nie" before, but had never taken the time to look her up. She is someone who obviously has a firm grasp on the meaning of life and the important things. I want (need) to be more like that.
I feel kinda silly now, posting about this latest cake I've made since it seems pretty trivial in comparison (and sorry it's another cake.. but maybe you can try it out yourself if you have a snowboard-obsessed husband, like me). I made it for my brother in law, Grayden, for his 14th birthday This is the snowboard he is really wanting:

So I made it's clone:

I cut my 9x11 cakes in half to make it flatter... more snowboard-like.
Then, I iced it in butter-cream frosting and laid my strips of marshmallow fondant sections.
Finally, I piped black butter cream around the edges and used the same icing to make the binding lines/dots and the Burton sign.
It was a fun project, Grayden loved it, too.
Photobucket