Showing posts with label fabric. Show all posts

Friday, December 17, 2010

Christmas Ornaments

I found some really cheap, ugly ornaments at the dollar store for 12 cents a piece and decided to make my own unique ornaments out of them.
So, I cut some strips of fabric..

Mod-podged them on to the ornament...

I let it dry sitting in the rim of a plastic cup...
And here they are. I even added a little ruffle on a few of them. One of the best parts is they're unbreakable and very kid safe.
Photobucket

Tuesday, October 26, 2010

Hoot Hoot

So my friend Krista introduced me to another great blog. There are a million out there.. this was just such a cute owl project I had to post it here so I can remember where I found it. Owl decor is still pretty big right now, so this could be something fun to make for Halloween, or just because it's fantastic.

Photobucket

Monday, October 25, 2010

Ruffled Pumpkins

So.. I just stumbled across these adorable pumpkins from Jen's blog. I seriously love them a lot. Since Halloween is almost here, I'm probably going to postpone making these until next year, but you better believe I'm going to make them! They are so dang cute and stylish. You can find the tutorial here.

Photobucket

Thursday, October 14, 2010

The great pumpkin improvisation

Like I said, Australians aren't big on Halloween. Case and point: I went to buy a pumpkin at the grocery store and they wanted $5.99 a kilo. Like $25 for a normal sized gourd.
Not happening.
So I gathered together some of that same orange fabric, decorative balls, ribbon, sticks from our yard and a little hot glue.

All I did was cut out a square of fabric and tucked in the sides until I had it formed around the ball. With a little hot glue I secured the top and then used some leftovers from this project to make the green stems. I adhered those to the pumpkins with a straight pin.

I also made mini pumpkins with my small balls. So cute.


Tomorrow I'll post pictures of the whole thing.

Photobucket

Wednesday, October 13, 2010

Halloween Pennant

This has got to be one of my favorite Halloween projects completed so far. It is fun and whimsical and best of all, EASY to make. All I did was cut out triangles of coordinating fabric and sewed them between a long piece of black fabric which I ironed in half. Zig-zaged down the length of the black and that's it!
I have one more item to post from my mantel and then I'll show you pictures of the whole thing.
Photobucket

Tuesday, October 12, 2010

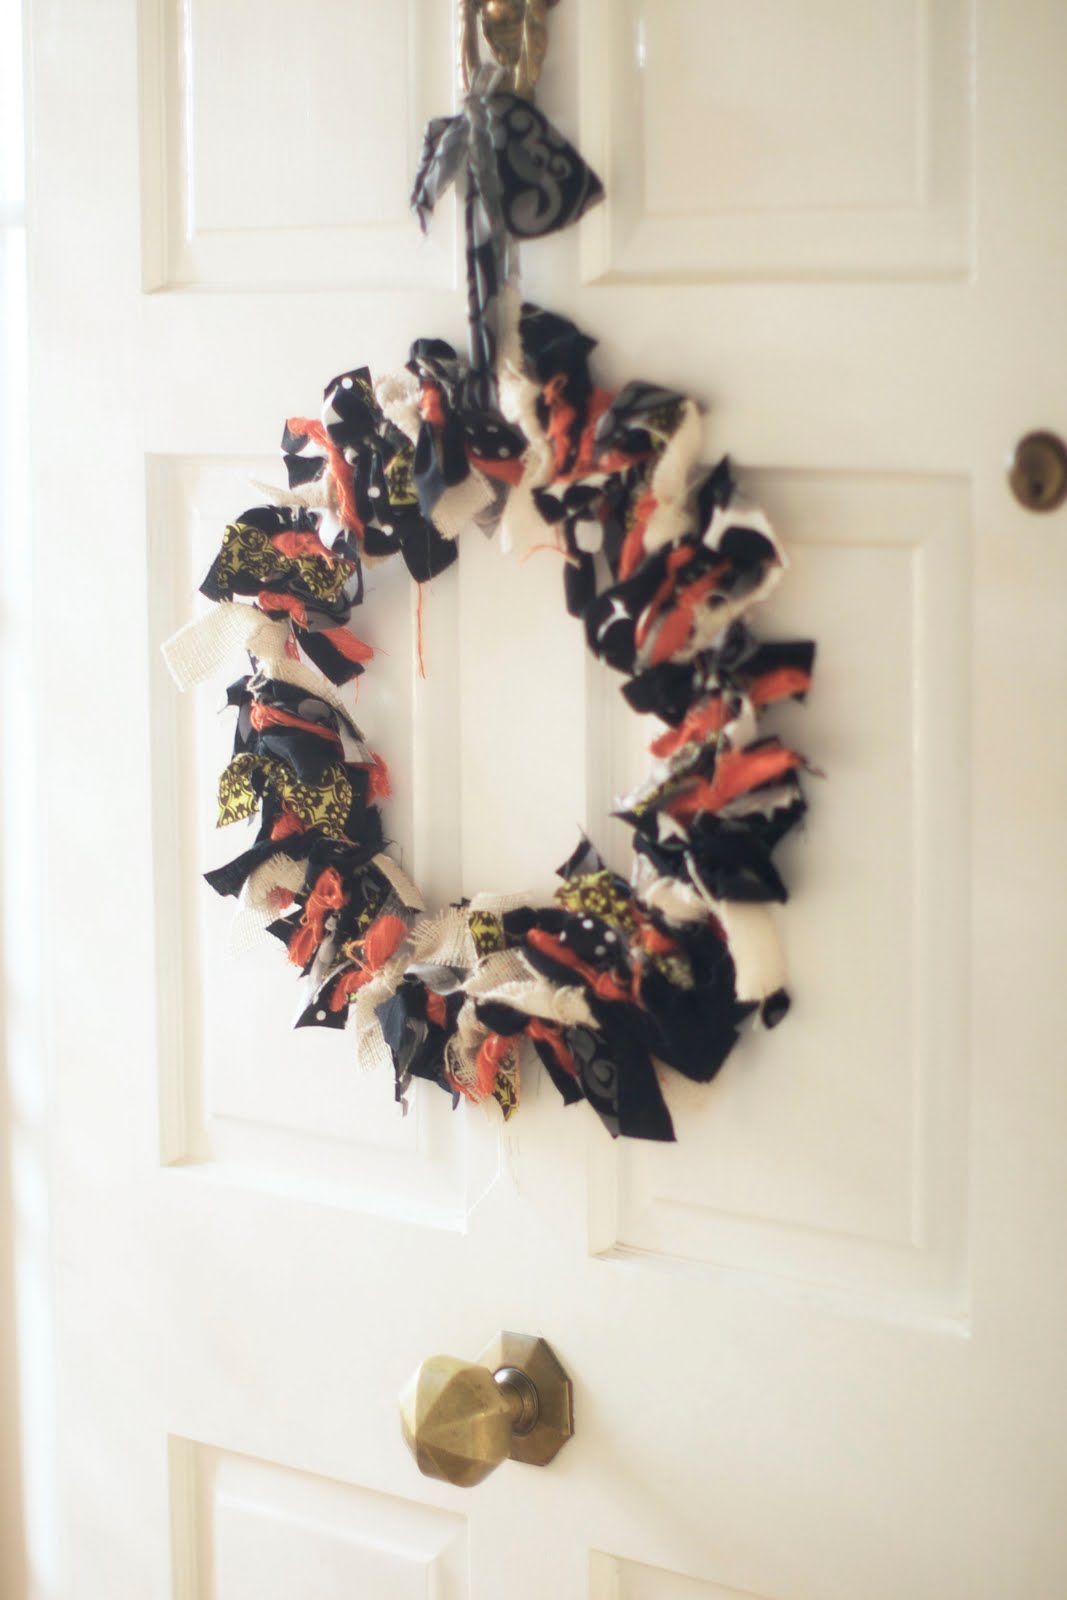
Hallowreath

Desperately needing something Halloween-y to adorn my front door I came up with this CHEAP wreath made simply by tying scrap pieces of fabric around the inside ring of an embroidery hoop (more on what I did with the outside ring of the same hoop later).
I just gathered all of my black, white, and orange scraps, cut them at varying lengths and widths and tied them on. Some I had to double knot, others I just tied one time.
Then I just tied it to my door-knock with a thick piece of fabric.
I love how it turned out.

Photobucket

Sunday, October 10, 2010

An easy way to bring in some orange

Since I brought ZERO decorations over here from the states, and also not having a lot of stores that sell Halloween decor, I've had to figure out some easy (and cheap) ways to bring the festive colors into the house. One way is by bringing out my inner scrapper, although not with paper. I've just used some of the random frames lying around and with fabric, ribbon, stamps and a few embellishments created some really simple decorations.


(apologies for these images...taken really late at night with no flash)

The good thing about these is that I can just take out and save what I've created inside them and use them for the next holiday.

Photobucket

Wednesday, October 6, 2010

Halloween Part 1

It may seem as if I'd completely given up being crafty, but between living for 4 months without any supplies, and then moving across the world to a little place called Australia, I haven't had a lot of opportunity. However, with a new house to make into a home, there will be lots of crafting going on to make up for my hiatus.

Even though it's already a week into October, Beth and I have decided to do a count-down to Halloween and post some fun things we've either made or would like to make. Australians don't do Halloween, so I've really had to dig in to find things that work. It's amazing how far a metre and a half of orange fabric will go.

My first project is an offshoot of this Christmas project I completed last year inspired by the fabulous V&Co.

Here's how to make your own.

First cut out the fabric you want to back the wreath. I used a thin off-white muslin, but any cotton will work fine.
Figure out how big you want the circle to be and use a bowl or pan lid to trace a circle.

Choose your fabrics. I used 4 fabrics here, but if you want it to be more or less colorful/busy you may use more/less. Cut fabric into strips 3"x1.25". Iron down the middle, like a hot dog.

Then iron both ends down so the middle comes to a point on top.


Once you have 10-12 of each color (if you stick to the 4 total) start gluing them onto your fabric backing.

You might want to lay them out first to see how it looks and make any adjustments.

Then mount it in your frame, securing the muslin with some tape.
I added a little green stem to mine to make it look like a pumpkin and added some text using thickers.

Good luck, and happy crafting! Stay tuned for lots of cheap and easy ideas.

Photobucket

Friday, September 17, 2010

baby quilt

Dear next baby of mine -- I will make this for you... and maybe one for me too because it's just too dang cute :)
Image of just dandy baby quilt pdf file
thanks, V and Co.

Photobucket

Tuesday, July 13, 2010

for amanda: stuffed animals


Amanda, sorry this has taken me sooo long to post. I made these cute little guys last Christmas. I found this tutorial for the elephant and this tutorial the giraffe on makeitandloveit. I then made a whale and seahorse pattern (printed off a silhouette, traced it onto fabric, etc.), and put them together the same way as the elephant and giraffe. The seahorse was a little more tricky because that skinny little tail is hard to get batting into. Make sure if you do it, you make it big enough to stuff. Have fun!

Photobucket

Monday, May 3, 2010

Fabric Decorative Balls

I was thinking the other day of how I could make my own decorative balls and just today I came across the PDF instructions for sale from V and Co.
I find them to be most adorable. Probably going to have to give them a try.


Photobucket
Older Posts Home